





Introduction
Setting up your Grandstream telephone adaptor is quick and easy.
Your Grandstream telephone adaptor allows you to connect two (HT812) or four (HT814) analog phones and fax machines to your Ooma Office setup. Follow the instructions below to install the device. You should be up and calling (or faxing) in a few minutes!
NOTE If you do not have an Ooma Office account, please visit office.ooma.com/signup.
Package Contents
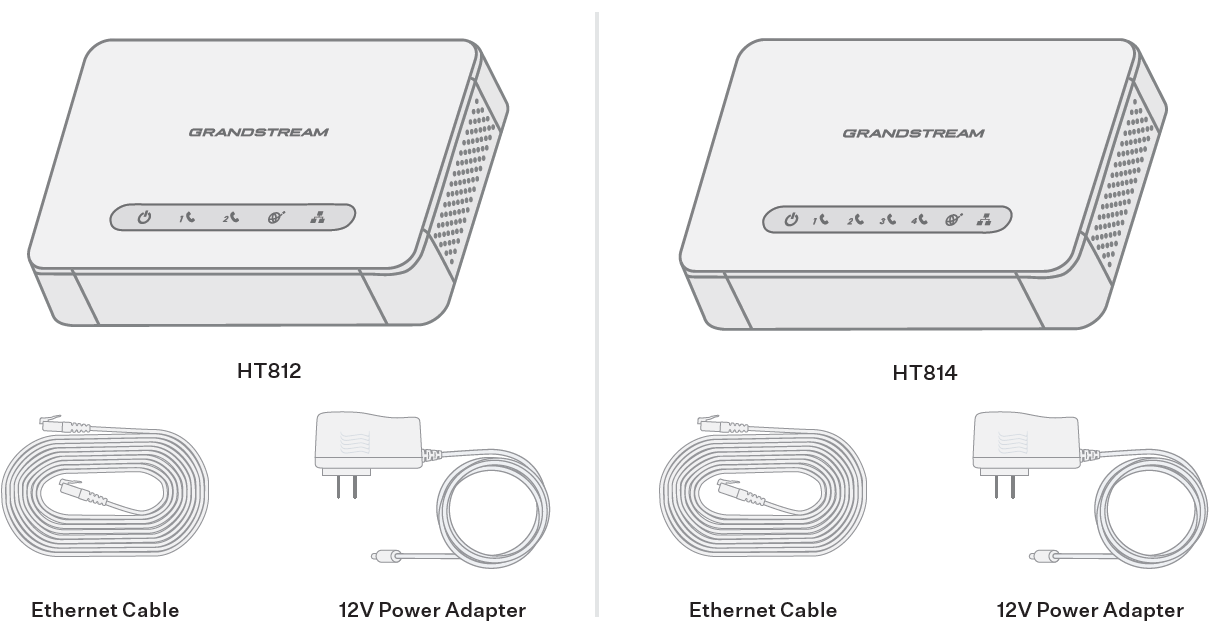
Step 1: Add Telephone Adapter to Your Account
If your device is labeled Ready to Call, you may skip this step and continue to Step 2.
Otherwise, you will need to add your telephone adapter to your Ooma Office account.
- If you are a new Ooma Office customer, please visit office.ooma.com/activate
- If you are an existing Ooma Office customer, please visit office.ooma.com/add-ip-phone
Once you have added the telephone adapter, continue to Step 2.
Step 2: Connect your Adapter to Power and the Internet
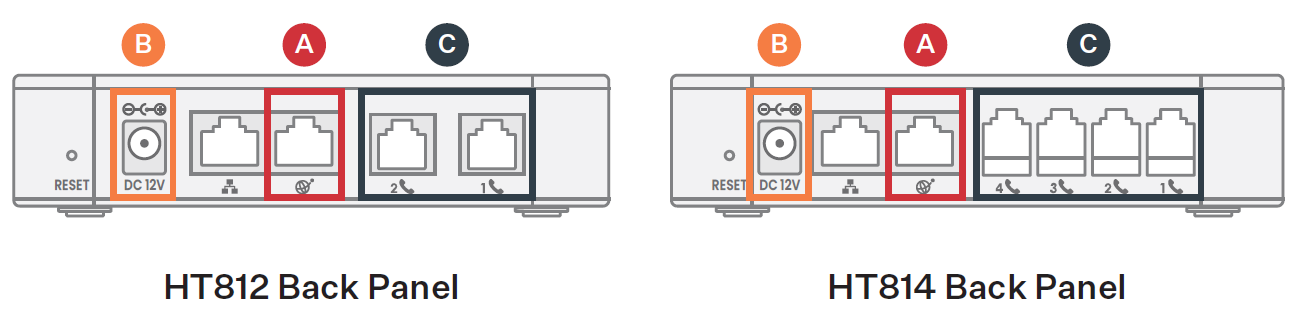
Use the included Ethernet cable to connect the WAN port  on the back of the device to an open Ethernet Ethernet port on your router or switch.
Connect the power adapter to the device  and plug it into a wall outlet.
After 30 seconds, the Power and WAN LEDs should be lit a solid blue.
Step 3: Connect Phones or Fax Machines
Use a standard telephone cable (not included) to connect an analog phone or fax machine to one of the available phone ports located on the back of the device  . When a phone port is ready for use, its Status LED will be lit a solid blue. Once you have connected a telephone, you can begin calling.
If you’re using a fax machine on a port, you’ll need to set that port to fax mode for optimal results. The account admin can do this by following these instructions:
- Log in to office.ooma.com or the desptop app as an administrator and go to the Devices page.
- Choose the Grandstream ATA adapter you’d like to update and select it to bring up the Edit Device page.
- Check the Enable Fax mode box beside the phone port that will be connected to the fax machine.
- Save your changes.
As soon as the port’s Status LED is lit a solid blue, you can begin using your fax machine.