





Introduction
Setting up your Wi-Fi enabled Ooma IP phone with Ooma Office is quick and easy. Follow the instructions below to install your phone. You should be up and calling in a few minutes!
NOTE If you do not have an Ooma Office account, please visit office.ooma.com/signup.
Package Contents
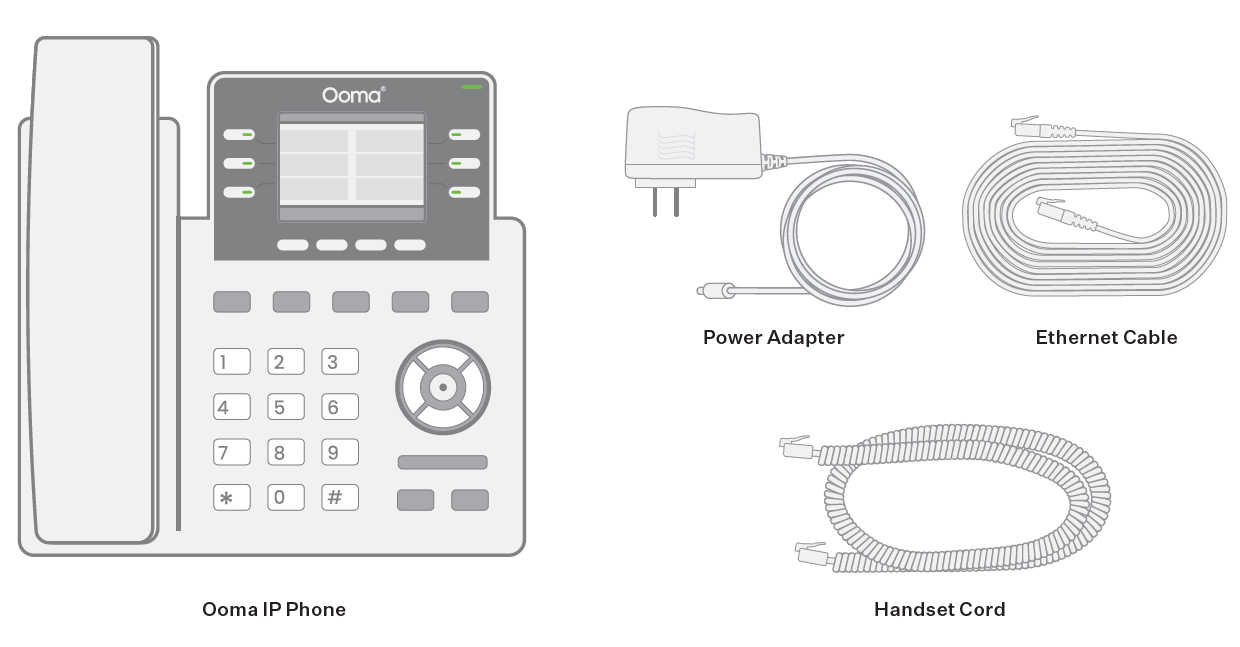
Step 1: Add the Phone to Your Account
If your phone is labeled Ready to Call, you may skip this step and continue to Step 2.
Otherwise, you will need to add your new phone to your Ooma Office account.
Visit office.ooma.com/add-ip-phone and follow the on-screen instructions.
Step 2: Assemble Your Phone
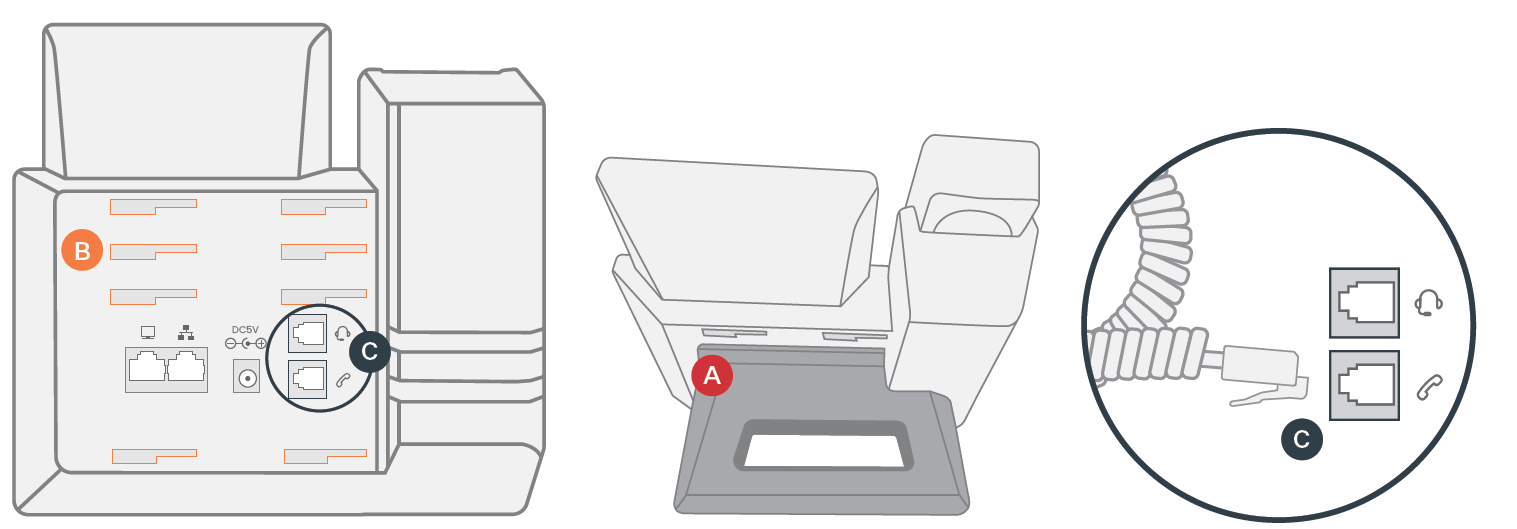
Attach the phone stand to the body. Align the stand  with the slots
  , and slide right until you hear a click. Connect the phone handset to the handset jack
  using the coiled phone cord.
Step 3: Connect Your Phone
You may connect this IP phone using either a hardwired Ethernet connection or a Wi-Fi connection.
Wi-Fi Connection
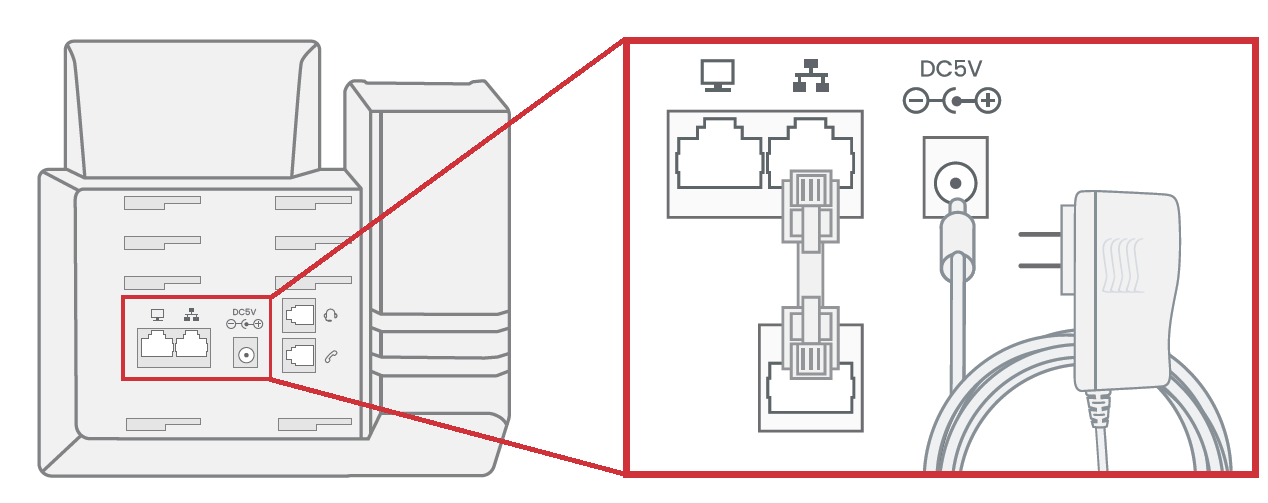
Connect the power supply as shown in the image above. Once it powers up, the phone will prompt you to connect to a Wi-Fi network. Follow the on-screen instructions.
If you do not see a prompt, follow these instructions to access Wi-Fi settings and connect:* 2602W: Press the Menu softkey (Menu icon), then Settings > Wi-Fi Settings > Wi-Fi Networks * 2624W/2615W: Press the Menu softkey, then System > Wi-Fi Settings > Scan
A list of Wi-Fi networks will be displayed. Select the network you’d like to connect to, then press the Connect softkey (Link icon). Enter the Wi-Fi password when prompted, then press the OK softkey (Checkmark icon).
Note: To enter your password, you will need to use a multi-tap approach with the phone keypad. Press the corresponding number key repeatedly until the desired number or letter appears.
For more detailed instructions by phone model and for entering passwords, please visit support.ooma.com/office/ooma-phone-wi-fi.
Ethernet Connection
Use the Ethernet cable that came with the phone to connect the INTERNET ( ) port on the back of the phone to any available Ethernet port on your router or switch.
Connect the power supply as shown below. Skip this step if you are using Power Over Ethernet (PoE).
Step 4: Let Your Phone Boot Up
Once the phone is powered on and connected to the Internet, the startup process will commence automatically.
When you see your name and extension number (e.g. x1001) displayed on the screen, your phone is ready to use to make and receive calls!