



Thank you

Thank you!

An Ooma Office Sales Representative will be in touch shortly.

If you do not receive the call within a few minutes, please call: 877-353-5185

Popup images - person doing consultation

Let’s talk!

Our team can help you find the right solution.

Spectacular Spring Specials for Small Businesses! Call 877-353-5185 today.
Chat support

Thanks — We’ve Got Your Request.

A member of our support team will reach out to you as soon as we’re back online. In the meantime, you can keep browsing our support articles.

Need an answer right now?

Most questions are already answered in our support articles — setup guides, troubleshooting and how-tos.

Visit the Support Site
Or leave a message and we’ll follow up
By clicking below you expressly agree to and acknowledge the statements set forth in this
link By submitting your contact information, you are giving express written consent to receive on your telephone, mobile or other electronic device auto-dialed, pre-recorded, artificial or other automated telemarketing calls or texts (SMS & MMS) from Ooma, its marketing partners, or third parties acting on Ooma’s behalf, even if your number is a on a corporate, state or federal Do Not Call (DNC) list. Carrier fees may apply. Consent is not a condition of purchase. It also indicates that you agree to Ooma’s Privacy Policy.
and in the Ooma Rewards Program Terms and Conditions.
Fix error

Yealink W60P quick start guide

Last Updated: July 21, 2025

Introduction

Integrating a Yealink Cordless IP phone with Ooma Office is quick, and can be accomplished in just a few simple steps. Follow the instructions below to provision the phone and put it into service immediately without any manual configuartion.

NOTE If you do not have an Ooma Office account, please visit office.ooma.com/signup.

Package Contents
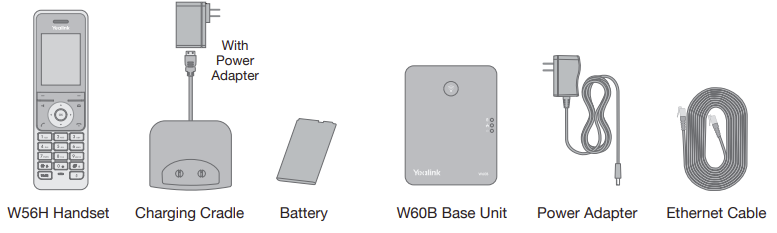
yealink_cordless_package_contents

Step 1: Register Phone Online

To get started, you must first add the Yealink Cordless IP Phone to your Ooma Office account. You can do this by visiting office.ooma.com/add-ip-phone and following the steps on that page.

Connect the Base Unit to the Network

Follow the instructions in the phone’s user manual to:

  • Plug the base unit into power
  • Connect the base unit to your Internet connection
  • Insert the battery into the handset
  • Connect the charging cradle to power
  • Charge the handset

Pair Handset

If the handset displays Not registered, press and hold the pairing button on the base unit until the LED on the base begins to flash.

Press the Reg softkey on the handset. The handset should pair with the base unit and synchronize its configuration.

Once you see the correct date/time display on the handset, press the Speaker button. If you hear a dial tone, your handset is ready to make and receive phone calls.